-
 Univers
-
 Ebooks
-
 Livres audio
-
 Presse
-
 Podcasts
-
 BD
BD
-
 Documents
-
- Cours
- Révisions
- Ressources pédagogiques
- Sciences de l’éducation
- Manuels scolaires
- Langues
- Travaux de classe
- Annales de BEP
- Etudes supérieures
- Maternelle et primaire
- Fiches de lecture
- Orientation scolaire
- Méthodologie
- Corrigés de devoir
- Annales d’examens et concours
- Annales du bac
- Annales du brevet
- Rapports de stage
La lecture à portée de main

6 pages
English
Le téléchargement nécessite un accès à la bibliothèque YouScribe
Tout savoir sur nos offres
Tout savoir sur nos offres
6 pages
English
Le téléchargement nécessite un accès à la bibliothèque YouScribe
Tout savoir sur nos offres
Tout savoir sur nos offres

Description
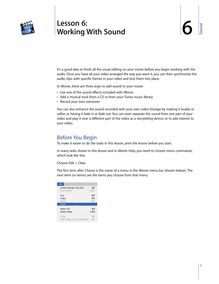
3 Lesson 3: Adding Transitions and Photos 3You’ve arranged your video clips in the order you want them. But the jump from one clip to the next is very abrupt, and you’d like to smooth things out. You can do this using transitions, video elements that blend the ends of clips together in a variety of ways—for example, fading from one scene into the next, or “pushing” the last scene offscreen as the next scene comes on.Before You BeginTo make it easier to do the tasks in this lesson, print the lesson before you start.In many tasks shown in this lesson and in iMovie Help, you need to choose menu commands, which look like this:Choose Edit > Clear.The first term after Choose is the name of a menu in the iMovie menu bar (shown below). The next term (or terms) are the items you choose from that menu.1Tutorial Adding a Transition Between Scenes You can place a transition between any two clips in your movie, or at the beginning or end of the movie. Keep in mind that some transitions, like Cross Dissolve and Push, will cut a few seconds from the length of your movie. For instance, if you put a 2-second cross dissolve between two clips, iMovie overlaps 2 seconds from the first clip and 2 seconds from the second clip to create the transition. This shortens your movie by 2 seconds. The length of a transition must always be shorter than either of the clips that it lies between.You select and set up transitions in the Transitions pane, shown ...
Informations
| Publié par | Shyan |
| Nombre de lectures | 30 |
| Langue | English |
Extrait
3
Lesson 3: Adding Transitions and Photos
3
You’ve arranged your video clips in the order you want them. But the jump from one clip to the next is very abrupt, and you’d like to smooth things out. You can do this usingtransitions,video elements that blend the ends of clips together in a variety of ways—for example, fading from one scene into the next, or “pushing” the last scene offscreen as the next scene comes on.
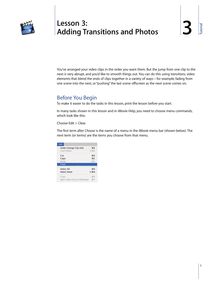
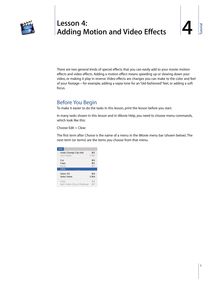
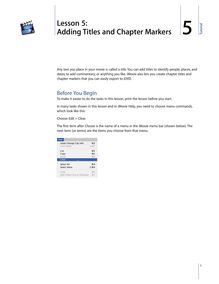
Before You Begin To make it easier to do the tasks in this lesson, print the lesson before you start.
In many tasks shown in this lesson and in iMovie Help, you need to choose menu commands, which look like this:
Choose Edit > Clear.
The first term afterChooseis the name of a menu in the iMovie menu bar (shown below). The next term (or terms) are the items you choose from that menu.
1
2
Adding a Transition Between Scenes You can place a transition between any two clips in your movie, or at the beginning or end of the movie. Keep in mind that some transitions, like Cross Dissolve and Push, will cut a few seconds from the length of your movie. For instance, if you put a 2-second cross dissolve between two clips, iMovie overlaps 2 seconds from the first clip and 2 seconds from the second clip to create the transition. This shortens your movie by 2 seconds. The length of a transition must always be shorter than either of the clips that it lies between.
You select and set up transitions in the Transitions pane, shown below. When you click a transition in the list, you see what the transition looks like in the preview monitor. If you position the playhead where you want to add a transition, and then click a transition, you’ll have an idea of how it will look in the selected clip.
To add a transition between scenes: 1Click the Transitions button to open the Transitions pane. Then select a transition in the list. Click the triangle next to a transition to see more like it. 2Set the length of your transition using the Speed slider under the preview monitor. The transition length is shown in the lower-right corner of the preview monitor. The duration is read as seconds:frames, so a timecode reading “15:08” means “15 seconds and 8 frames.” Some transitions provide additional settings. For example, if you select Push, you can also use the arrow buttons to choose the direction from which the next scene enters. Other transitions, such as Scale Down, allow you to set where the transition originates. If the pointer changes to a crosshair when you click in the preview monitor, you can click again to select the origination point of the transition. 3Click Preview to see how the transition will look with the settings you made. You can continue to make adjustments and preview them until you have the effect you want.
Lesson 3: Adding Transitions and Photos
4Drag the title of the transition from the transitions list to the clip viewer, placing it between the two clips you want it to join. You can continue to work in your movie while the transition is rendered. In the clip viewer, a rendered transition is identified with an icon, shown below.
Deleting and Editing Transitions You can’t move a clip in your movie or add a video effect to it if there is a transition between it and an adjacent clip. To move it, you have to delete the transition first. To delete a transition: m Select the transition and press the Delete key, or choose Edit > Clear. When you delete a transition, your clips are restored to their original length. You can then move them, apply video effects to them, or add a different transition between them. If you change your mind about the length of a transition you have already added, you can edit it. To edit a transition: 1Select the transition in the clip viewer. 2In the Transitions pane, adjust the length of the transition using the Speed slider. 3Click Update. Applying Transitions to Multiple Clips If you want to use the same transition for more than one clip—or all your clips—you can select the clips and then click Apply. Depending on the size of your project, this can be a big time saver. You can also delete or edit multiple transitions in the same way. To select multiple clips: •Hold down the Shift key and select the first and last clips in a range. All the clips in between are also selected. •Hold down the Command key to select individual clips that aren’t next to each other (discontiguous clips). Keep in mind that rendering transitions for multiple clips increases the amount of time needed to render the clips. If you chose a duration that is too long for some of your clips, you’ll see a message asking you if you want iMovie to automatically adjust the duration for the short clips. If you agree, the duration for the shorter clips is up to half the clips’ duration.
Lesson 3: Adding Transitions and Photos
3
4
Start and Finish
Adding Photos iMovie lets you easily add photos from your iPhoto library to your movie. You can add photos as still shots that linger for as long as you like, or you can pan across the photo or zoom in or out of the photo. Use the Photos pane, shown below, to select photos and add motion to them.
Note:To see photos in the Photos pane, you must have iPhoto 2 or later installed, and you must have at least one photo in your iPhoto library.
To add a still photo to your movie: 1Click the Photos button to open the Photos pane. 2Choose an album from the pop-up menu. 3Make sure the Ken Burns Effect checkbox is not selected. 4Select a photo from the photos displayed and drag it to the clip viewer or timeline viewer. Remember to select the Ken Burns Effect checkbox when you want to add motion to a photo.
Adding Motion to a Photo You can add motion to a photograph by panning across the image or by zooming in or out of the image. This is called the “Ken Burns Effect” (after the technique developed by the noted film documentarian Ken Burns). You use the controls in the Photos pane (shown below) to add motion to your photos.
Lesson 3: Adding Transitions and Photos
Pan control
Zoom slider
Zooming a Photo Zooming a photo means making it appear that the camera moves toward subjects in the photo or away from them. To zoom a photo: 1Click the Photos button and make sure the Ken Burns Effect checkbox is selected. 2Select a photo in your iPhoto library and click Start. 3Move the Zoom slider to the left or right until you find the point where you want to begin the zoom. 4Click Finish. 5Move the Zoom slider until you see where you want to end the zoom. 6Move the Duration slider to set the length of time you want the zoom to take. 7Click Preview to see the overall effect. 8Click Apply when the effect looks the way you want. The photo appears as a clip at the end of your movie in the timeline viewer. You can drag the clip to where you want it to appear in your movie. Panning a Photo Panning a photo means making it appear that the camera sweeps across the face of a still photograph. This adds interesting movement to still shots. To pan a photo: 1Click the Photos button and make sure the Ken Burns Effect checkbox is selected. 2Select a photo in your iPhoto library and click Start. 3Move the pointer over the image in the preview monitor until a hand appears, then press the mouse button and drag the image until you see the place in the image where you want to begin the pan.
4Click Finish. 5Drag the image to where you want to end the pan. 6Move the Duration slider to set the length of time you want the pan to take. 7Click Preview to see the overall effect. Click Reverse to quickly change the direction of the movement. 8Click Apply when the effect looks the way you want. The photo appears as a clip at the end of your movie in the timeline viewer. You can drag the clip to where you want it to appear in your movie.
Lesson 3: Adding Transitions and Photos
5
Using Pan and Zoom Together You can use pan and zoom together to draw attention to something in your photograph, such as one member in a group photo. If your photo is not large enough to use a pan effect, you can also zoom in at the start to give you a larger area to work with. Combine the instructions above if you want to add both pan and zoom to a photograph. When you click Start or Finish, you can set the amount of zoom and move the photograph to the position you want for the start or end of the pan. To make your photos really stand out, you can use pan and zoom to crop them before you add them to your movie. Cropping allows you to remove unnecessary or undesirable parts of the picture and change the focus to what you want to emphasize. To crop a photo before you add it to your movie: 1Click the Photos button and make sure the Ken Burns Effect checkbox is selected. 2Select a photograph from your iPhoto library and use the pan and zoom controls to position your photo how you like it. 3Press Start. 4Press the Option key and click Finish. 5Set the duration of the clip. 6Click Apply or drag the photo to your project. Applying Motion to Multiple Photos If you have a number of photos that you want to add motion to, you can quickly apply the same settings to more than one photo at a time. For example, if you are creating a slideshow of your photographs, you may want all the photos (or some of the photos) to play for the same length of time. You can select the photos (up to 10 at a time), set the duration and any other pan and zoom effects you want to use, then click Apply (or Update if you’re making changes to photos already in your movie). To select multiple clips: •Hold down the Shift key and select the first and last clips in a range. All the clips in between are also selected. •Hold down the Command key to select individual clips that aren’t next to each other (discontiguous clips).
©2004 Apple Computer, Inc. All rights reserved. Apple, the Apple logo, and iMovie are trademarks of Apple Computer, Inc., registered in the U.S. and other countries. iPhoto is a trademark of Apple Computer, Inc. The owner or authorized user of a valid copy of the iMovie software may reproduce this publication for the purpose of learning or teaching to use the software, excluding commercial or paid-for purposes.


-
Univers
-
Ebooks
-
Livres audio
-
Presse
-
Podcasts
-
BD
-
Documents
-
Jeunesse
-
Littérature
-
Ressources professionnelles
-
Santé et bien-être
-
Savoirs
-
Education
-
Loisirs et hobbies
-
Art, musique et cinéma
-
Actualité et débat de société
-
Jeunesse
-
Littérature
-
Ressources professionnelles
-
Santé et bien-être
-
Savoirs
-
Education
-
Loisirs et hobbies
-
Art, musique et cinéma
-
Actualité et débat de société
-
Actualités
-
Lifestyle
-
Presse jeunesse
-
Presse professionnelle
-
Pratique
-
Presse sportive
-
Presse internationale
-
Culture & Médias
-
Action et Aventures
-
Science-fiction et Fantasy
-
Société
-
Jeunesse
-
Littérature
-
Ressources professionnelles
-
Santé et bien-être
-
Savoirs
-
Education
-
Loisirs et hobbies
-
Art, musique et cinéma
-
Actualité et débat de société
- Cours
- Révisions
- Ressources pédagogiques
- Sciences de l’éducation
- Manuels scolaires
- Langues
- Travaux de classe
- Annales de BEP
- Etudes supérieures
- Maternelle et primaire
- Fiches de lecture
- Orientation scolaire
- Méthodologie
- Corrigés de devoir
- Annales d’examens et concours
- Annales du bac
- Annales du brevet
- Rapports de stage
Signaler un problème


YouScribe
Le catalogue
Le service
© 2010-2024 YouScribe