-
 Univers
-
 Ebooks
-
 Livres audio
-
 Presse
-
 Podcasts
-
 BD
BD
-
 Documents
-
- Cours
- Révisions
- Ressources pédagogiques
- Sciences de l’éducation
- Manuels scolaires
- Langues
- Travaux de classe
- Annales de BEP
- Etudes supérieures
- Maternelle et primaire
- Fiches de lecture
- Orientation scolaire
- Méthodologie
- Corrigés de devoir
- Annales d’examens et concours
- Annales du bac
- Annales du brevet
- Rapports de stage
La lecture à portée de main

9 pages
English
Le téléchargement nécessite un accès à la bibliothèque YouScribe
Tout savoir sur nos offres
Tout savoir sur nos offres
9 pages
English
Le téléchargement nécessite un accès à la bibliothèque YouScribe
Tout savoir sur nos offres
Tout savoir sur nos offres

Description
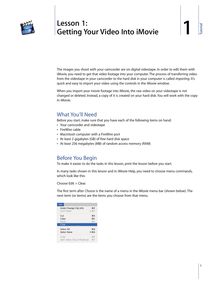
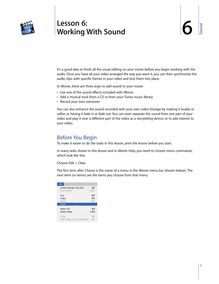
6 Lesson 6: Working With Sound 6It’s a good idea to finish all the visual editing on your movie before you begin working with the audio. Once you have all your video arranged the way you want it, you can then synchronize the audio clips with specific frames in your video and lock them into place.In iMovie, there are three ways to add sound to your movie:• Use one of the sound effects included with iMovie • Add a musical track from a CD or from your iTunes music library• Record your own voiceoverYou can also enhance the sound recorded with your own video footage by making it louder or softer, or having it fade in or fade out. You can even separate the sound from one part of your video and play it over a different part of the video as a storytelling device, or to add interest to your video.Before You BeginTo make it easier to do the tasks in this lesson, print the lesson before you start.In many tasks shown in this lesson and in iMovie Help, you need to choose menu commands, which look like this:Choose Edit > Clear.The first term after Choose is the name of a menu in the iMovie menu bar (shown below). The next term (or terms) are the items you choose from that menu.1Tutorial Adding Sound EffectsiMovie comes with a selection of short sound effects that you can use to enhance your movie. Use the Audio pane, shown below, to add sound effects.To add a sound effect:1 Click the timeline viewer button (it has a ...
Informations
| Publié par | Bavem |
| Nombre de lectures | 15 |
| Langue | English |
Extrait
6
Lesson 6: Working With Sound
6
It’s a good idea to finish all the visual editing on your movie before you begin working with the audio. Once you have all your video arranged the way you want it, you can then synchronize the audio clips with specific frames in your video and lock them into place.
In iMovie, there are three ways to add sound to your movie: •Use one of the sound effects included with iMovie •Add a musical track from a CD or from your iTunes music library •Record your own voiceover
You can also enhance the sound recorded with your own video footage by making it louder or softer, or having it fade in or fade out. You can even separate the sound from one part of your video and play it over a different part of the video as a storytelling device, or to add interest to your video.
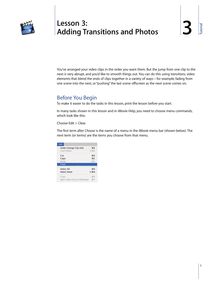
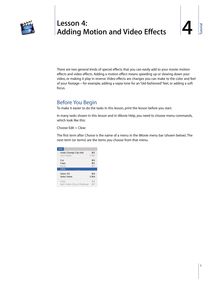
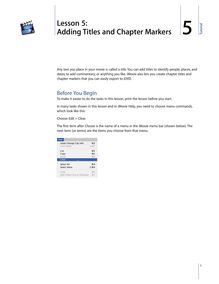
Before You Begin To make it easier to do the tasks in this lesson, print the lesson before you start.
In many tasks shown in this lesson and in iMovie Help, you need to choose menu commands, which look like this:
Choose Edit > Clear.
The first term afterChooseis the name of a menu in the iMovie menu bar (shown below). The next term (or terms) are the items you choose from that menu.
1
2
Adding Sound Effects iMovie comes with a selection of short sound effects that you can use to enhance your movie. Use the Audio pane, shown below, to add sound effects.
To add a sound effect: 1Click the timeline viewer button (it has a clock on it) to open the timeline viewer. 2Click the Audio button to open the Audio pane. 3Choose iMovie Sound Effects from the pop-up menu. A list of sound effects appears. 4Drag the sound effect you want into one of the audio tracks in the timeline viewer. The sound effect appears as an audio clip in the track.
5Adjust the position of the audio clip by dragging it until you see the frame in which you want the sound effect to begin.
Adding Music From a CD or iTunes You can add music to your movie from a CD or from your iTunes library.
To add music from a CD: 1Click the timeline viewer button to open the timeline viewer. 2Click the Audio button to open the Audio pane. 3Insert a CD into the disc drive. 4Choose the CD from the pop-up menu. A list of CD tracks appears. 5Move the playhead to the frame where you want the music to begin.
Lesson 6: Working With Sound
6Select the track you want and click “Place at Playhead.” Preview your work by selecting the clip where you added the track and clicking Play in the iMovie playback controls. You can continue to adjust the position of the clip until you get it where you want it.
To add music from your iTunes library: 1Select the video clip in which you want the audio track to begin in the timeline viewer. 2Click the Audio button and choose iTunes Library from the pop-up menu. The list of tracks in your iTunes library appears. 3Move the playhead to the frame where you want the music to begin. 4Select the track you want. You can search for a particular track by typing some words from the title in the Search field. Click the Play button to the left of the Search field to listen to a track in the list. 5Click “Place at Playhead.” The audio file appears as an audio clip in the second audio track. Preview your work by selecting the video clip where you added the audio and clicking Play in the iMovie playback controls. You can continue to adjust the position of the audio clip until you get it where you want it.
Note:You must have at least QuickTime 6.2 installed on your computer to hear your iTunes music play in your iMovie project. For the best results, you should download and install QuickTime 6.4.
You can download QuickTime 6.4 from the QuickTime website at www.apple.com/quicktime/download.
Adding a Voiceover You can record sound directly into iMovie if you have a built-in microphone or an external microphone connected to your computer. You can use this feature to create your own voiceover narrations or commentaries.
To find out if your computer has an internal microphone: 1Open System Preferences and click Sound. 2Click Input. Any microphones are listed.
To record a voiceover: 1In the timeline viewer, drag the playhead until you see the frame where you want the voiceover to begin. 2Click the Audio button to open the Audio pane. 3Click the Record button.
Record/Stop button
4Speak clearly into the microphone. Speak clearly and loudly, but don’t shout. While you are speaking, the input meter should be yellow. If it turns red, you are speaking too loudly.
Lesson 6: Working With Sound
3
4
5Click the Stop button to stop recording. The sound you recorded appears in the first audio track. Like any other audio clip, it can be dragged to a new position in either of the audio tracks.
Working With Audio Clips Audio files, which are in MP3, WAV, or AIFF format, appear as audio clips in either of the two audio tracks in the timeline viewer, shown below. Your video also contains an audio track that you can extract from video clips and edit like other audio clips.
Extracted audio is placed in the first track and imported audio is placed in the second track. You can add more audio clips to any part of your movie by overlapping clips in the audio tracks. You can also drag audio clips from one track to another and reposition them to synchronize audio with your video.
Extracted audio
Imported music
Positioning an Audio Clip In the timeline viewer, you get different results depending on where you place the pointer when you drag a clip.
Dragging from the center of the clip moves the clip to a different location in your movie. As you move the audio clip to the right or left, a gap is created. You can drag other audio clips to fill the gap, or you may want to leave a gap if you want silence.
Gap
Drag pointer
Dragging from the end of an audio clip toward the center of the audio clip shortens, or trims, the audio clip. The trimmed audio is still present, but it isn’t displayed and you won’t hear it in your movie. If you decide to extend the audio clip back to its original size (or close to the original size), you can drag the end you want to extend. If you empty the iMovie Trash, the trimmed part is deleted and you won’t be able to extend the clip.
Direct trimming pointer
Lesson 6: Working With Sound
Aligning Audio With Video If you want to synchronize an audio clip with specific frames, you can easily align the audio clip so that it begins with the frame you want.
To align an audio clip with a specific frame: 1Click the timeline viewer button (it has a clock on it) to see the timeline viewer. 2Drag the audio clip along the track until you see the frame you want to start with (you can watch the frames play in the iMovie monitor). 3Select the clip where you added the audio clip and click Play in the iMovie playback controls to preview your work. You can continue to adjust the position of the clip until you get it where you want it.
Adjusting the Length of Audio Clips If your audio clip is longer than you want, there are two ways to shorten it. You can split the audio clip and delete the part you don’t need, or you can have only part of a music track play in your movie and preserve the whole audio clip.
To split an audio clip: 1Drag the playhead to where you want the music to end. 2Choose Edit > Split Selected Audio Clip at Playhead. 3Select the unwanted portion of the audio clip and press the Delete key. Trimming an Audio Clip If you don’t want to split the audio clip, you can trim it by dragging the ends of the audio clip. Direct trimming is especially useful if you want to try out different parts of the music to find the best part before splitting the audio file.
If you move an audio clip over an empty space, the clip fills the empty space. Audio clips don’t ripple the way video clips do. If you move an audio clip over another clip, the clips overlap and you hear both audio clips at the same time.
Identifying Full and Cropped Clips Once you begin moving clips, you’ll notice a difference in the appearance of audio clips in the timeline viewer. Full clips have rounded corners. Clips that have been trimmed or cropped have straight edges where they’ve been shortened. An audio clip with straight ends can always be extended if you haven’t emptied the iMovie Trash since you trimmed the clip.
Full clip
Lesson 6: Working With Sound
Trimmed clip
5
6
iMovie volume
Adjusting Sound Volume Playback sound levels in iMovie are relative to the volume level of your computer. This means that if you set your movie volume level fairly low, someone viewing your movie on their computer might have to turn their computer volume up very high to hear it. Likewise, if you set your movie project to a high volume, a user might not be able to turn down their computer volume far enough to view your movie without disturbing the neighbors.
If you want to turn the volume in iMovie up or down while you’re working on a project, use the Volume slider under the iMovie monitor.
Audio checkboxes
You can mute audio tracks, including the audio track that’s contained within the video track (the audio you recorded along with your video). Muting can help you focus on the sounds in one track at a time.
To mute an audio track: m Deselect the checkbox at the right end of the track. Note:If a track is muted when you export your finished movie to a QuickTime viewing format, the sounds in that track are not included in your QuickTime movie.
Adjusting the Volume of Audio Clips In addition to adjusting the sound in iMovie and muting entire audio tracks, you can make a simple adjustment to the volume of an audio clip using the Edit Volume slider, shown below.
Volume level bar
To adjust the volume of an audio clip: 1Select the clip in the timeline viewer. 2Click the Edit Volume checkbox. A volume level bar appears in all audio clips to show the current volume level of each clip. 3Move the slider to adjust the volume of the selected clip up or down. If you make an adjustment to the volume while you are playing a clip, iMovie pauses playback and then immediately plays the clip with your adjustment. This makes it easier to get the results you want.
Lesson 6: Working With Sound
Fine-Tuning Volume Levels in Clips You can select a clip and use the volume level bar to adjust the volume within the clip up and down, make it fade in and out, or make it drop out completely in certain sections. This gives you greater control over what you hear in your movie.
By editing the volume of your audio tracks, you can enhance your movie’s sound by: •Muting or quieting a video’s audio track so you can better hear a voiceover, sound effect, or music on another track •Adjusting the mix of the three tracks (for example, making the video track’s audio louder compared to the other tracks) •Muting video clips entirely so all you hear is the audio in the other tracks
To adjust volume levels in a clip: 1In the timeline viewer, select the Edit Volume checkbox. A bar appears across the audio tracks of the timeline viewer, showing the current volume levels for each clip.
Volume level marker
2Click the bar at the point at which you want to begin increasing or decreasing the clip volume. A marker appears. 3Drag the marker up or down to increase or decrease the volume from that point to the end of the clip.
You can create as many markers as you need to adjust the volume as finely as you want. To make the volume adjustment more gradual, drag the small end of the marker to create more of a slope.
To delete a volume level marker: m Select the volume level marker and press Delete.
To make the audio clip fade in and out: 1Select the clip in the timeline viewer. 2Select the Edit Volume checkbox. 3Click a point on the volume level bar where you want to adjust the volume. A marker appears. 4Drag the marker to where you want the sound adjustment to end (if fading in) or begin (if fading out). 5Drag the smaller point on the marker up or down, depending on whether you want the volume to get louder or softer. You can adjust how rapidly the volume changes with the slope of the marker.
Lesson 6: Working With Sound
7
8
Locking Audio Clips in Place When your audio clips are lined up with your video the way you want, you can lock them to the video so that if you move a video clip, it won’t misalign your audio.
To lock audio to video: 1Position your audio clip where you want it to begin in your movie. 2Choose Advanced > Lock Audio Clip at Playhead.
Locking pins
The pins indicate that the audio clip is locked to the video clip.
To unlock audio from a video clip: 1In the timeline viewer, select the audio clip. 2Choose Advanced > Unlock Audio Clip.
Extracting Audio From Your Video The video you import has an embedded audio track; you can separate the audio track from your video and move it to a different place in the movie. With this technique, calledextracting audio, you can move the sound or dialogue from one video clip to another.
For instance, you might have recorded video of your grandmother telling stories about her youth, and you may also have some old photos of her that you scanned into iPhoto and imported into iMovie. Using the audio extraction feature, you can easily separate Grandma’s narration from the video of her telling stories, and then add her narration to the photos.
When you extract the audio from a video clip, it appears as an audio clip in one of the audio tracks. You can then move it around as you would any audio clip. The sound is not actually removed from the video clip from which you extracted it; the sound is copied into a separate audio clip and the video clip is muted. (You can turn the sound back on by checking the audio checkbox for the video track.)
Lesson 6: Working With Sound
1 2
To extract the audio from a video clip: In the timeline viewer, select the video clip. Choose Advanced > Extract Audio. The extracted audio clip appears in the first audio track directly below the clip from which it was extracted. The audio is locked to the video, but you can unlock it if you want to move it to another part of your movie.
Getting Professional Results If you want really professional-sounding audio in your movie, you can use iMovie’s audio waveforms to align, or “snap,” key video frames to key audio events. For example, you can set video frames to start or end exactly at the start or end of the audio with no awkward moments of silence. If you’re creating a slideshow, you can make your photo clips change at audio peaks (such as a drum beat).
Viewing Audio Waveforms Audio waveforms, shown below, are a graphic representation of audio intensity. While an individual audio file can have a number of channels (such as left and right), iMovie’s waveforms average all the channels in one waveform.
You can use waveforms to see where an audio clip builds in intensity and use these visual cues to better align your video frames to the audio. Increasing the zoom of a clip allows you to see more detail in the waveform.
To turn on waveforms: m Choose iMovie > Preferences and click the “Show audio track waveforms” checkbox. If you don’t see waveforms in your tracks, deselect the Edit Volume checkbox. To see more detail in the waveforms, move the Zoom slider to the right.
Snapping Audio to Video When snapping is turned on in your movie, you’ll see a yellow snap line (shown in the illustration above) appear as you reach the end of video and audio clips or come within 3 or more frames of audio silence. When the yellow snap lines of your audio and video align, you’ll have a very precise fit that would be difficult to achieve without snap lines.
To turn on snapping: m Choose iMovie > Preferences and click the “Timeline snapping” checkbox.
©2004 Apple Computer, Inc. All rights reserved. Apple, the Apple logo, iMovie, iTunes, and QuickTime are trademarks of Apple Computer, Inc., registered in the U.S. and other countries. iPhoto is a trademark of Apple Computer, Inc. The owner or authorized user of a valid copy of the iMovie software may reproduce this publication for the purpose of learning or teaching to use the software, excluding commercial or paid-for purposes.


-
Univers
-
Ebooks
-
Livres audio
-
Presse
-
Podcasts
-
BD
-
Documents
-
Jeunesse
-
Littérature
-
Ressources professionnelles
-
Santé et bien-être
-
Savoirs
-
Education
-
Loisirs et hobbies
-
Art, musique et cinéma
-
Actualité et débat de société
-
Jeunesse
-
Littérature
-
Ressources professionnelles
-
Santé et bien-être
-
Savoirs
-
Education
-
Loisirs et hobbies
-
Art, musique et cinéma
-
Actualité et débat de société
-
Actualités
-
Lifestyle
-
Presse jeunesse
-
Presse professionnelle
-
Pratique
-
Presse sportive
-
Presse internationale
-
Culture & Médias
-
Action et Aventures
-
Science-fiction et Fantasy
-
Société
-
Jeunesse
-
Littérature
-
Ressources professionnelles
-
Santé et bien-être
-
Savoirs
-
Education
-
Loisirs et hobbies
-
Art, musique et cinéma
-
Actualité et débat de société
- Cours
- Révisions
- Ressources pédagogiques
- Sciences de l’éducation
- Manuels scolaires
- Langues
- Travaux de classe
- Annales de BEP
- Etudes supérieures
- Maternelle et primaire
- Fiches de lecture
- Orientation scolaire
- Méthodologie
- Corrigés de devoir
- Annales d’examens et concours
- Annales du bac
- Annales du brevet
- Rapports de stage
Signaler un problème


YouScribe
Le catalogue
Le service
© 2010-2024 YouScribe